
Harness the full potential of AI in Microsoft Copilot Studio by creating a Prompt Library. Whether you’re improving customer service, automating HR workflows, or streamlining reporting, a Prompt Library helps you save time, ensure consistency, and boost productivity.
This step-by-step guide will show you how to build and optimize a prompt library for Copilot Studio. You’ll learn everything from crafting effective prompts to organizing them for reuse, so you can start integrating AI effortlessly into your workflow.
What is a Prompt Library?
A Prompt Library is a collection of predefined instructions, or “prompts,” tailored for specific tasks. These prompts guide the AI in Copilot Studio to generate accurate and relevant outputs for various business functions.
Key Benefits of a Prompt Library:
- Time-saving: Eliminate repetitive tasks by reusing prompts across different workflows.
- Consistency: Standardize AI responses to ensure uniformity across outputs.
- Customization: Adapt prompts to specific use cases like HR bots, customer service, or data analysis.
Real-life Examples:
- HR Bots: Automate responses to frequent HR queries, like holiday policies or benefits packages.
- Customer Service: Use prompts to summarize customer tickets or suggest replies.
- Reporting Assistants: Generate weekly or monthly insights directly from data.
Prerequisites for Building a Prompt Library
Before you begin, make sure you have the following:
- Access to Copilot Studio: Sign in to Copilot Studio.
- Basic Prompt Knowledge: Familiarize yourself with how prompts function, including clear instructions and expected outputs.
- Intro to Adaptive Cards: Understand how to use Adaptive Cards for collecting dynamic input. They simplify interaction by capturing variables like text or dropdown selections.
Steps to Create Your Prompt Library
Step 1. Create a Custom Prompt
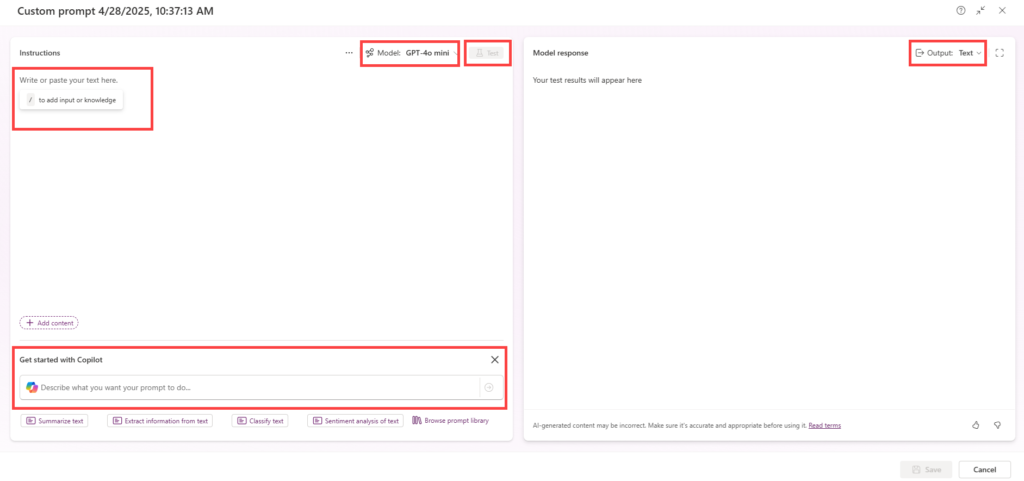
Start by crafting a prompt for your specific task.
- Navigate to Copilot Studio > AI > Prompt Libraries > Add New Prompt.
- Define Your Prompt:
- Write clear instructions, e.g., “Summarize the last 10 messages from this Teams chat.”
- Include an expected outcome, e.g., a bulleted list or paragraph.
- Introduce Variables:
Add variables where dynamic input is required, e.g., [Employee Name], [Time Frame].
Best Practices for Writing Prompts:
- Be Clear: Use concise language to eliminate confusion.
- Add Context: Ensure the AI understands the task. For example, “Please summarize customer feedback from the last 7 days.”
- Specify Output Format: Clearly state your expected format, e.g., “Provide a list of key issues.”
Step 2. Use Adaptive Cards for Input
Adaptive Cards bring interactivity to your prompts by collecting user inputs.
What Are Adaptive Cards?
Adaptive Cards are UI components used to gather dynamic inputs like text, choices, or numbers.
How to Create Adaptive Cards:
- Go to Power Automate or Copilot Studio and select the Adaptive Card option.
- Design Your Card:
- Text Box: Capture freeform inputs like “Enter client name.”
- Dropdown: Offer predefined choices like date ranges or departments.
- Example Layout:
“`
{
“type”: “AdaptiveCard”,
“body”: [
{
“type”: “TextBlock”,
“text”: “Choose a Report Type”,
“weight”: “Bolder”
},
{
“type”: “Input.ChoiceSet”,
“choices”: [
{ “title”: “Sales Report”, “value”: “sales” },
{ “title”: “Performance Report”, “value”: “performance” }
]
}
]
}
“`
Tips for Adaptive Cards:
- Keep it simple: Avoid overwhelming users with too many input fields.
- Use Labels: Clearly label each input for better usability.
- Group Related Inputs: Place related fields together for logical flow.
Step 3. Organise and Save Your Prompts
Unorganized prompts can quickly become overwhelming. Follow these steps to systematize your library:
- Categorize Prompts:
Group them into logical sections like Reporting, FAQs, or Notifications.
- Add Descriptions:
Provide a short snippet explaining the purpose of each prompt.
- Adopt Naming Conventions:
Use consistent, descriptive names, e.g., “HROnboardingSummary” or “ReportingWeeklySales.”
Step 4. Test Your Prompt
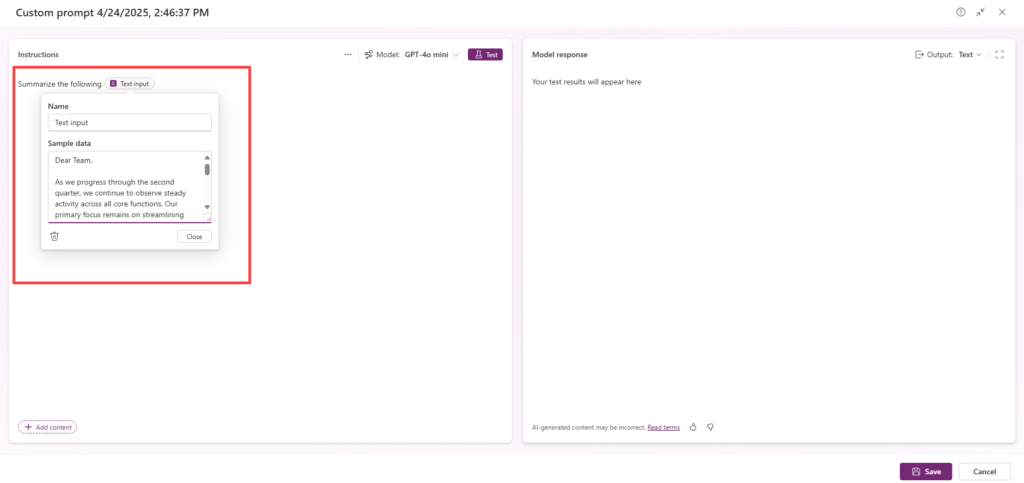
Testing ensures your prompts deliver the desired results.
- Preview in Copilot Studio:
Test your prompt against real-world scenarios with different input variables.
- Refine as Needed:
Adjust instructions, variables, or expected outcomes to improve performance.
- Example:
Start with, “Summarize recent customer reviews.” If the AI output is too broad, refine it to “Summarize the main complaints in recent customer reviews.”
Step 5. Reuse Prompts in Workflows
One of the biggest advantages of a Prompt Library is reusability.
- Integrate With Bots:
Use prompts in chatbots to automate FAQs or generate summaries.
- Embed in Flows:
Add prompts to Power Automate workflows for tasks like generating reports or drafting emails.
- Example Workflow:
Use a “Weekly Summary” prompt in a Copilot that compiles key team updates and shares them automatically via Teams.
Bonus Tips and Troubleshooting
Here are expert tips to get the most out of Copilot Studio prompts:
- Add Comments:
Use comments in your prompt descriptions to clarify intent for collaborators.
- Troubleshoot Issues:
- Variable Not Recognized: Check for typos or missing input fields.
- Unexpected Output: Refine the instructions for greater specificity.
- Leverage Templates:
Explore the Sample Solution Gallery for ready-made prompts to save time.
Start Building Your Prompt Library Today
A well-designed Prompt Library is like a Swiss Army knife for your organization’s AI needs. By following these steps—from crafting clear prompts to leveraging Adaptive Cards and testing thoroughly—you’ll have a powerhouse of tools that save time and enhance productivity.
Remember to start small, iterate, and document your process to expand your library over time. The potential is endless. Take your first step today by signing in to Copilot Studio and creating your first custom prompt.
Read Also:
1 Comment
Pingback: Power Apps vs Power Automate: Which One is Right for You in 2025?